DIY
For those of us who prefer self-paced and self- directed learning, there are a host of great materials and practices available, both online and in person, that will greatly accelerate your learning while preventing a lot of rookie mistakes. While these things are presented in some sort of order, I’d recommend doing everything at once—full immersion. It’s going to take a while.
5 Million Years of Practice
The very best way to wrap your head around PBR is to spend a year touring beaver dam complexes every chance you get. Not idly staring at them from the shore either, but properly seeing every square foot of the deepest core of their builds. That means wading, swimming, snorkeling, paddle boarding, staying up late to watch the beavers at work, seeing what they build, tracking the wildlife, and looking at dams during high and low flows, under ice, and so on.
See some at high altitude in the mountains, down low in agricultural areas, in brackish tidal wetlands, deserts, as large a variety as you can manage. Take pictures and video, take notes, and try to figure out why they do what they do. Get comfortable being wet, muddy, and smelling like pond scum. Make this your second job, and dedicate as much time as you possibly can. Eventually, you’ll be able to start predicting what you’ll see when you visit a new complex—you’ll be thinking like a beaver.
Gravity, Time, and Luck
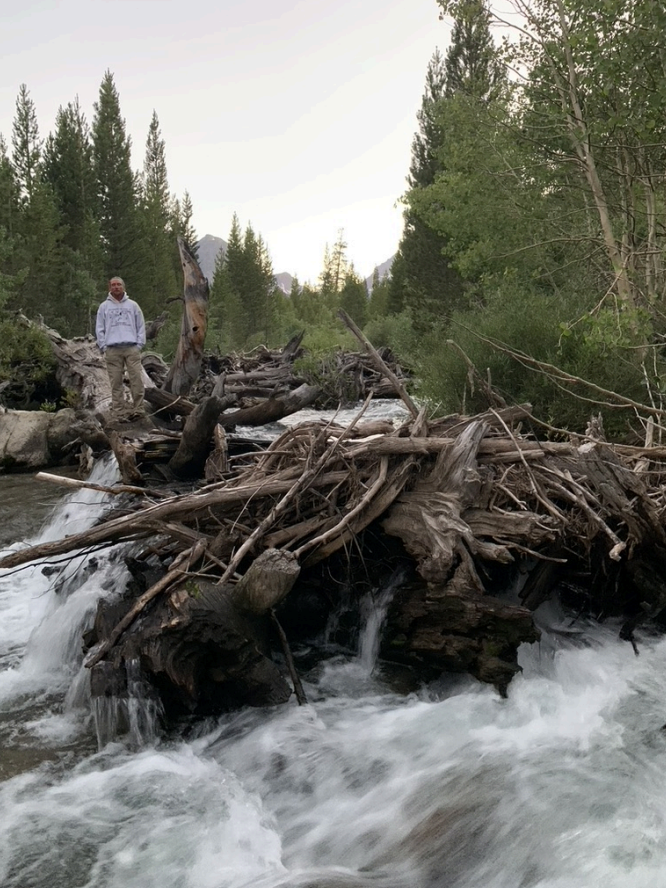
Beavers and people aren’t the only ones who build spectacular, messy structures that do great work. Anytime water is moving, it’s both building up and tearing down the landscape, and when you have high flows and available wood, somewhere in the system magic is happening. The photo to the left is a natural wood jam in Lundy Canyon, which has been piling up for years, and it’s driving all sorts of complex processes.
These are the other half of what we’re mimicking on a build. Call them PALS, jams, whatever—they’re intended to drive geomorphic processes that promote widening, wiggling, and complexity.
Somewhere within reach of you is a waterway with these kinds of things happening in it, even if they’re tiny and inconspicuous—make it a habit of finding and closely observing them. Look at where the water speeds up, slows down, deepens, wiggles, and imagine the critters that prefer each of those kinds of habitats and flow regimes, then think about how you’d build what you’re looking at.
OK, I’ve waded through 20 different beaver dam complexes, what now?
Touring beaver complexes has rehydrated your mental landscape, and taught you how a healthy riverscape really looks. Now attend an in-person training in the field, actually building things by hand.
There is no substitute for dirt time, and the lab rats and pixel pushers who try to smash nature into neat little boxes will forever be frustrated at the refusal of living systems to submit to human will. So keep your feet in the mud, and your handle on the shovel.
The Utah State University Restoration Consortium has quite a few courses, workshops, and short form intensives, and I highly recommend them.
We are part of the CAL PBR Network, and host an annual multi- day “Build Like A Beaver” Training, always in the field, usually in October. It’s a multi-day intensive, and all hands-on.
You may also be able to volunteer with the Scott River Watershed Council, or Symbiotic Restoration, both based in California.
Food For The Brain

The Utah State University Restoration Consortium hosts the LTPBR Manual, which is a proper doorstop and will cram your brain with useful knowledge. It’s tough wading, but very much worth the effort.
When I was starting out, I took the PBR course from them twice and read that manual, and every second invested was worth the effort.
At the risk of being duplicative, I’ve also started assembling some of what I’ve learned in this manual. It’s a shorter, easier read than the LTPBR Manual, heavy on photos, and hopefully makes some of the concepts approachable. Everything included is straight from the field, the muddy front lines of our effort to make this a better world. No abstract theories, no math, just my very best effort to help you get started. Want a look? Click anywhere on the manual. Below here you’re headed into the weeds—there’s a bunch of technical stuff that’s not yet in a manual but will be soon.
The Gear
Here’s some of what we use in the US, all bought with our own money. We’re not sponsored, nobody owns us, we’ve never taken tools from a company to promote them, and I have exactly zero brand loyalty. The below is by no means comprehensive or the only way to do it, but it’s what’s worked for us.
Brute Toil: Fiskars shovels are welded steel, and hold up well. Don’t pry big rocks with them, you’ll split the blade at the point. Anything wood, fiberglass or mild steel you’ll bend and break in the first week. These are great for moving looser material.
Fiskars digging shovel (spade), or Leonard all steel diamond spade, or take a Kobalt spade and cut a 30 degree taper on the flat with an angle grinder. These are what we use for cutting slices of sod and mud off the banks, which then make great packing material to seal the dam.
Fiskars loppers as well, with a caveat. They all work ok, with the power gear ones holding up less well, but the 28” Power-Levers are the only ones I really love. Also, they have two legs and will walk away—we lose more loppers than anything else, by a factor of 3.
Digging/rock bars are useful, with the best having a point on one end and a blunt chisel on the other. Any brand is fine. It is possible to bend one if you’re strong enough, and watch the chisel point if pulling really hard—I’ve almost hit myself in the face when the bar slipped.
For hand saws, the Samurai saw line is pretty cheap and cuts as well as a Silky. Get the longest one you can—for smaller cuts use the loppers.
Other stuff you can use whatever’s lying around. Post driver, sledgehammer, mattock, etc. aren’t super high use items, and rarely mission critical.
Noisy Cutlery
Small: 540i Husqvarna E-saws, two of em. These things are the business—the first thing everybody reaches for, quiet, and you don’t have to breathe nasty two-stroke death all day. They’ll spin a 16” bar no problem, and have built-in smarts so you can’t bog ‘em down and kill the battery.
Medium: 550xp with a 20’ bar, 562xp with a 24’ bar, nothing unusual here. Both are great, cut fast, reasonably light, and not horribly thirsty.
Large: Stihl MS400 with a bark box, Husqvarna 372 big bore and muffler mod. These are both really loud, smoggy beasts that are sometimes the answer for direct-felling big trees, and we do what we can to leave them in the trailer.
We’ve tried and killed a whole bunch of smaller, home-owner grade, yard sale, and big- box saws brought by various folks, and can heartily recommend none of the above. The first two years thinned that herd to nothing. Buy professional grade from Stihl or Husqvarna.
It’s worth buying local from whatever shop you’re close to. That way when you drop them off in the winter to get fixed or tuned up, you have a relationship with the folks who will be doing the work. Pay the extra, it’s worth it.
A to B
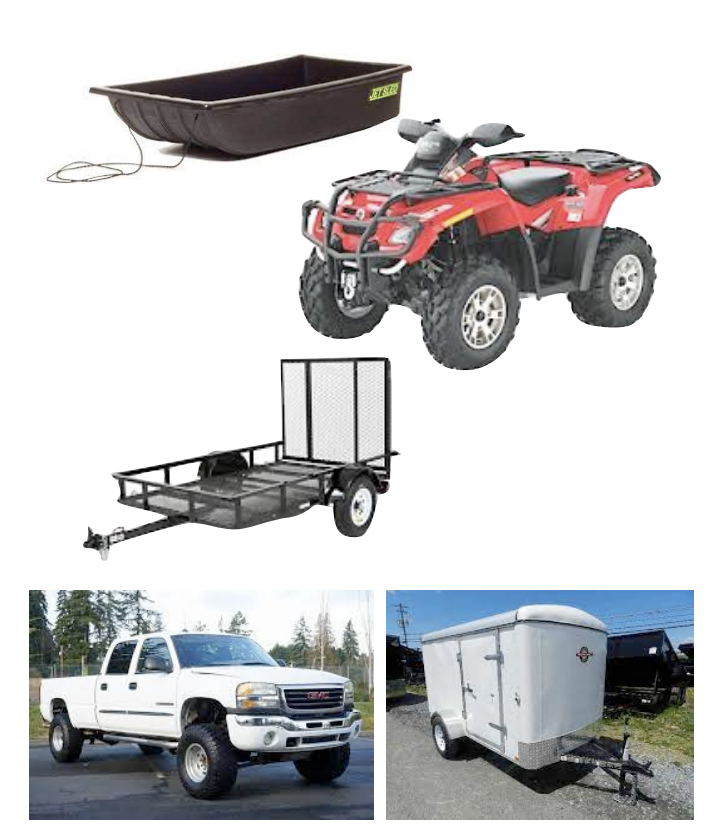
Jet Sleds are great, and it’s worth getting the runner kits—they’ll wear through and start to take on water pretty fast. Chuck the hand tools in and you’ve got an instant leg workout.
We’re using a 2014ish Can-Am Outlander 500cc 4wd quad a lot, and have a really tired Polaris Sportsman 500 as a track vehicle for winter missions. Probably need to upgrade that one…
So far, we’ve been able to get away with a smallish trailer that the quad can tow, and that can carry the quad when towed by a truck. I’d say this is the bare minimum, and we’ll probably upgrade in 2024. The cheapie brands will die, but can be hot-glued back together at any welding place, so…spend now, or spend later.
For a jobsite trailer, we got a 5×10 with a side door and rear ramp—it’s now too small and we’ve bought a 6×12 to go with it, but was perfect for the first few years of having a 5 person crew.
As to trucks, it’s an 03 GMC Sierra diesel for the heavy hauling, and a Tacoma that’s not getting used much right now. It’s a little underpowered for hauling the size of trailers we have now.
Gravity and Trickery
Don’t buy anything from anybody that competes on price—it’d be pretty dumb to die when something janky snaps under tension, and your last thought probably won’t be “Damn, I’m glad I saved ten bucks on the equipment that just killed me. Totally worth it, no regrets.”
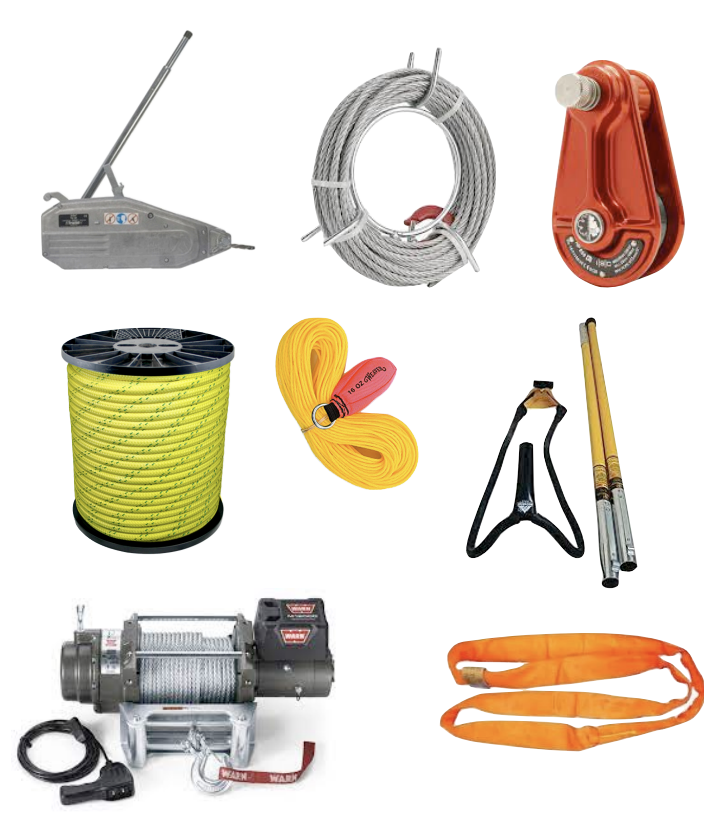
Tirfor Griphoist TU32, 60’ of cable (don’t kink it, the stuff’s made of unicorn hair with a very weird twist nobody makes) and a few 30k pulleys for 2x rigging or re-directs. A longer cable might help in some cases, but it’s also really heavy.
150’ of 30k bull rope, which adds a lot of stretch to the system, but won’t cut you in half when it breaks. Big Shot launcher, throw ball and rope for getting stuff up high in trees for leverage.
12k winch on the truck, with 100’ of line, plus a 2500 winch on the quad with 50’ of line
Big straps, shorter and smaller ropes, random kibble related to hauling stuff around.
What’s currently missing in this system is a strain gauge, which lets you see exactly how hard you’re pulling. Good safety measure, but crazy expensive, so we just make sure that everything in the system is overrated for the pull the winch or griphoist can put out.
Needlework
Stitching up a structure ain’t rocket surgery, and neither is the stuff that makes it possible. There are roughly three tiers, each uniquely awful.
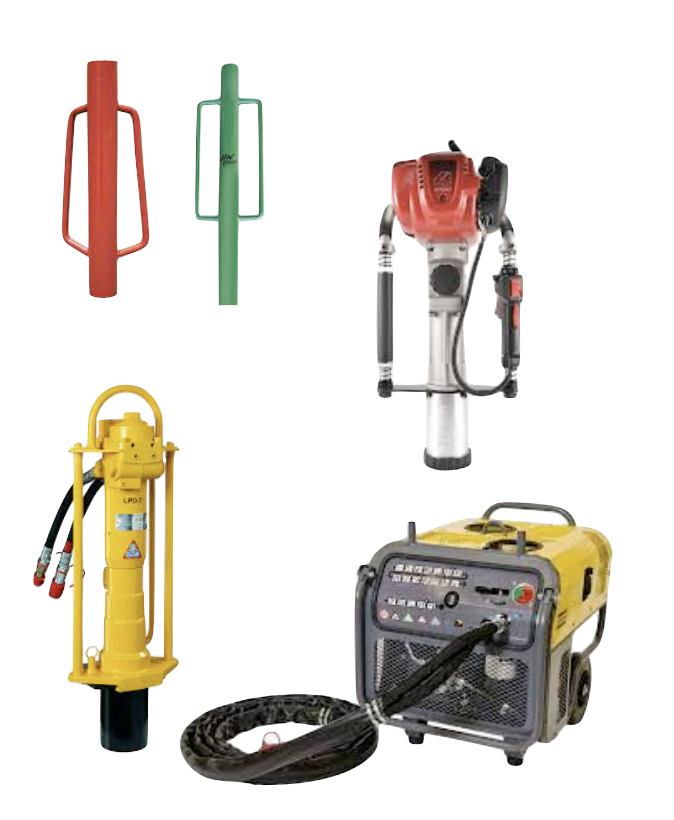
Hand post driver—the epitome of keep it simple, also the pinnacle of physical misery, unneeded repetitive stress, and forehead bashing cavemannery. I hate these things so very much, and, in a wilderness area they’re all you’ve got. So do everything you can to avoid their use with natural anchors, then buy whatever you can carry and swing.
Gas driver—get the biggest one you can, it should weigh 40 lbs. Honda motors can’t be killed, Titan and Rhino are widely available, and I haven’t seen the benefit of the “high-end” drivers that cost over a thousand bucks. Before transporting, dump the gas back into your can, then idle the driver dry—they’ll dump fuel all over otherwise. They work fine with posts under 3”, driving into softer streambeds. Gravel is slow, and cobble will likely stop them.
Hydraulic driver—Atlas Copco LPD T (75 lbs) or LPD HD (83 lbs), Chicago Pneumatic paints ‘em red and slaps on a sticker. Our powerpack is an LP13 30, but you’ll need an 18 40 for the HD. Remember to change the oil and hydraulic fluid (use bio-hydraulic) every once in a while, and turn off the gas valve when you’re moving it so it doesn’t flood. Heavy, brutal, highly effective, and so much faster than a gasser that if you have any volume of posts to drive in even moderately hard streambed it’s worth it to lug the beast around.
Housing
Usually, we’re cooking in the open air, and everybody’s sleeping in tents or their vehicles. Sprinter vans, truck beds, subarus and even a prius have all been temporary housing. Zero degree bag, big fat sleeping pad, and a real pillow makes all the difference.
The big game changers the last two years have been the tent cabins. We’ve got a 16×20 “lounge” canvas tent cabin with a woodstove in the middle, usually with some sport mats in one corner for stretching, using rollers and theraballs, and whatever else keeps you from getting too crunchy. Firewood, camp chairs, drying clothes, a couple dogs, and it fills up fast.
Pitched at right angles is a 10×12 tent cabin for the kitchen, which has stoves and cooking implements in it, but no food totes or coolers—those live outside. The morning bagel rush makes this tent pretty cramped.
A pair of three burner stoves will be enough for a decent sized crew. Bring plenty of water and a filtration system so you can stay out longer.
Tools and Technology
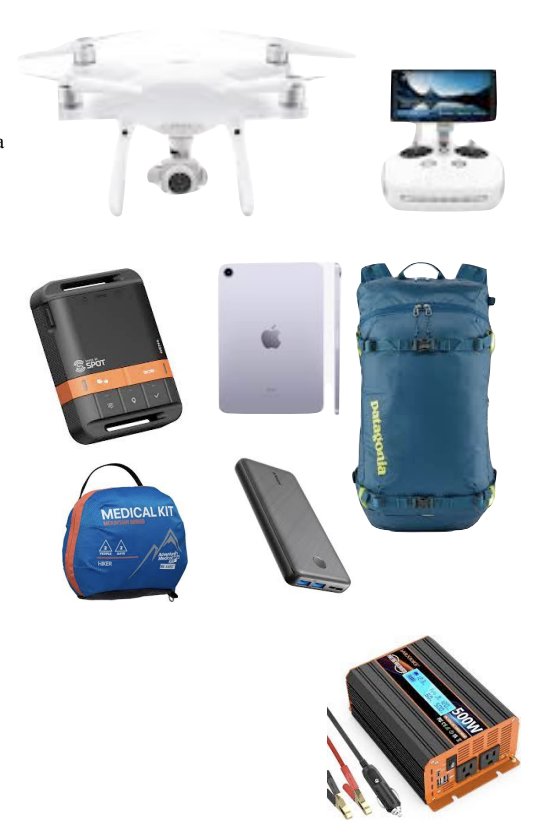
- Buy a cheap drone off Craigslist, and make sure it’s one that Drone Deploy supports.
- Now erect a tiny headstone and have a quick funeral in your backyard for the poor thing. Grieve it now—you’re going to crash and destroy at least one, which is why you don’t buy an expensive one yet.
- I’ve got a Phantom 4 which is fine, and cheap used. You’ll want extra props, 4 batteries and a dual charger. If it doesn’t come with a microSD card, get one—128GB is plenty.
- Either use your phone or get an ipad mini, and get bulletproof waterproof idiotproof cases for them/it.
- Buy and download GIS Kit
- Install DJI Go software
- Buy and download Drone Deploy
Before leaving for the field:
- Back up your phone and laptop, and leave the backup drive at home.
- Find out if you’ll have cell service
- Charge all batteries • Format SD card
- Download latest version of all software
- Download offline base map in GIS Kit and Drone Deploy
- Survey the site in Google Maps, and divide the project into logical pieces based on geographic/geologic features. These will roughly be your flight polygons.
Pack this stuff:
- Drone, props, microSD card, 4 batteries, charger, usb cable
- Ipad Mini, fully charged • Phone and a fully charged portable brick like an Anker
- Cold weather and running GIS Kit with the GPS on will drain your phone battery in about five minutes. A full, 4-charge external battery is enough for one day of field work.
- Field pack—med kit, spot beacon, water, snacks, layers
- Inverter and 12V adapter to plug into your vehicle and charge your batteries.
In the field—flying your “before” documentation
- Starting at the downstream end of the reach, and at the corner of your process space, draw a polygon in Drone Deploy that will cover your process space plus a little and ideally use 3 batteries or less. Adjust the angle of the flight pattern to put the starting point over your position, unless it adds a ton of time to the flight.
- I fly at 270 feet, to get 1 inch/pixel resolution. That may be overkill, I don’t know.
- Note: The cheapest Drone Deploy plan only allows 1000 photos per upload, and you’ll need something like a 15mbps upload connection to get that done in a reasonable timeframe. This is the choke point, and often can’t be done in the field.
- Launch the drone, grab your field pack and the extra batteries you’ll need for the flight, and walk upstream along one edge of the flight pattern, staying in visual contact with the drone. If the walking’s easy, you can go up along the stream and check things out as you hike.
- When the batteries get low and it tries to head home, flip the switch to manual and fly the drone to where you are.
- Note: the drone altimeter lies—fly it to your position at photography height, then drop it straight down. I’ve crashed one by trusting the altimeter.
- Swap batteries, relaunch, keep following. Once the flight’s done, pull the props off and drop the drone in your pack, then start designing, headed back downstream
Design, and building a base map
- Fire up GIS Kit, and start a new project.
- Walk the channel back to your vehicle, adding the appropriate symbol to GIS Kit and planting a survey flag at each point where you’re going to build a structure. Do what you can to keep the flags on the same side of the channel, and easily visible.
- Also mark possible stream crossings, hazards (ground wasp nests, hidden rebar and fence posts, etc.), remnant channels, survey markers, buried treasure, and anything else that might be useful.
- Once you’re back at the vehicle, plug all the batteries in to charge, then start downloading the photos to your laptop. Once they’re transferred, change the file name to Project Name/Date/Reach/Flight so it’s descriptive and useful.
- Note: the batteries won’t charge if they’re too hot or too cold—a cooler with ice packs in it, or your car’s heater, works fine.
- Keep it up until you’ve got everything captured and designed, then head back to town and find a cheap hotel with good internet. Run Speed Test in the lobby to verify upload speeds before you pay for a room—I’ve gotten screwed before.
- Start the Drone Deploy photos uploading before you even call for a pizza—they’re going to take a while.
- With that running in the background, plug in your phone/tablet and export a KMZ file from GIS Kit to your laptop. This will give you a big picture overview of the whole thing.
- Now upload it to your google drive so you don’t lose the thing when you drop your phone in the water (again).


